Canning 101: The Basics
So, you’ve planted seeds or seedlings and then watered and weeded all summer. Now it’s time to harvest, and while much of your garden’s bounty ends up on your dinner plates, baked into goodies and eaten fresh as your pick it, there is generally an excess of fruits and vegetables. After all, you can only eat cucumbers at every meal for so many days in a row before you start to feel like you are, in fact, a cucumber.
This is where food preservation and canning comes in. Canning is a wonderful way to store your fruits and vegetables from the garden or the farmer’s market while they are in season and make the harvest last through winter when local and seasonal foods are scarce.
Canning in both water baths and pressure cooking heats the food, killing any microorganisms that may grow, and also creates a vacuum seal in the jar. The vacuum seal will prevent any air from coming in contact with the preserved food that could encourage cell growth and cause the food to spoil.
Why Can?
Yesterday Aimee asked why you choose to can. There are many reasons why you and your family may choose to can and preserve your own food. These are just a few. Be sure to check out why others can and join in on the conversation yourself!
**Canning saves you money.
**It is eco-friendly.
**Canning cuts down on food waste.
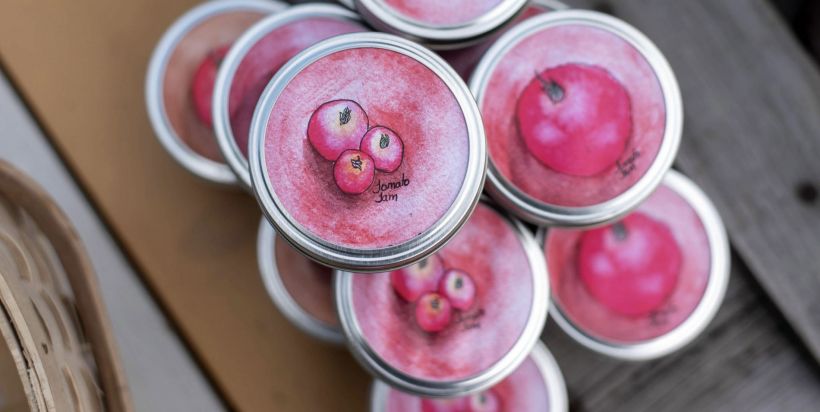
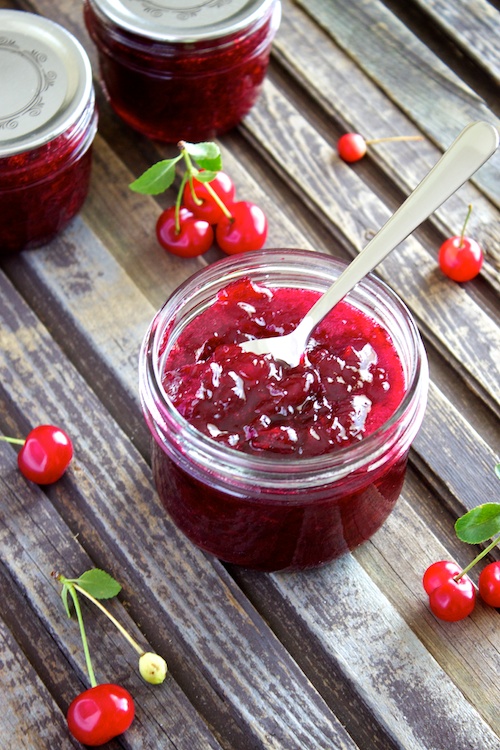
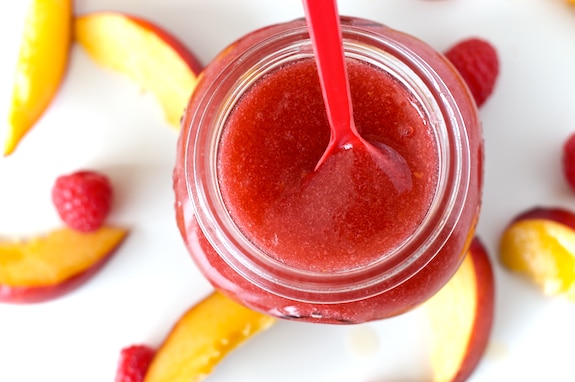
**It’s fresher and tastes better, like these berry preserves.
**No BPA or additives.

What You Need to Get Started
- Canning Jars and Seals – use mason-style jars with sealed lids and rings, which can be found at most grocery stores
- Wide-Mouth Funnel – makes filling jars with sauces or jams easier and less messy
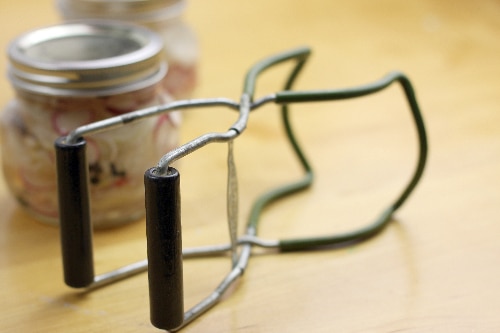
- Lid Wand – for easy removal of lids and rings from boiling water
- Ladle – for filling jars
- Large Pot – for boiling canned preserves and jams, fruits, tomatoes and pickled vegetables
- Pressure Canner – used for canning vegetables and meats because it has the ability to reach a higher temperature
- Tongs of Jar Lifters – rubberized lifters make removing cans from their water bath less slippery, but a good pair of tongs can work just as well
- Clean Cloths – used to wipe down jars, lids and rims of jars
The Process of Preserving
1. Start by sterilizing your jars.
Wash your lids and jars in hot soapy water. Then move them to a boiling water bath for ten minutes to sterilize. Remove jars from the water bath, but leave the lids in the hot water until you’re ready to use them to ensure they don’t come in contact with anything before you seal your jars.
2. Slice, dice, pickle and pour.
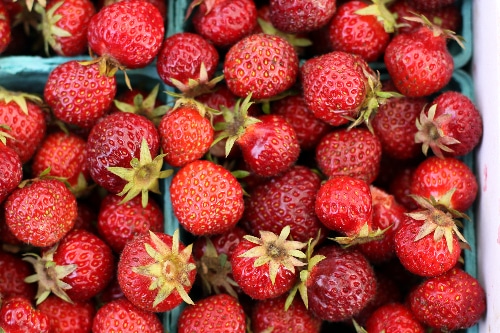
It is best to can your fruits and vegetables immediately after you harvest them for the highest vitamin and nutrient concentration. The longer a fresh piece of produce sits, the more vitamins it loses.
Prepare fruits and vegetables by slicing and dicing, prepare your jams and preserves using your favorite recipes (or ours, as we’ll have several of our top recipes coming up this week), and pickle vegetables before placing in the jars.

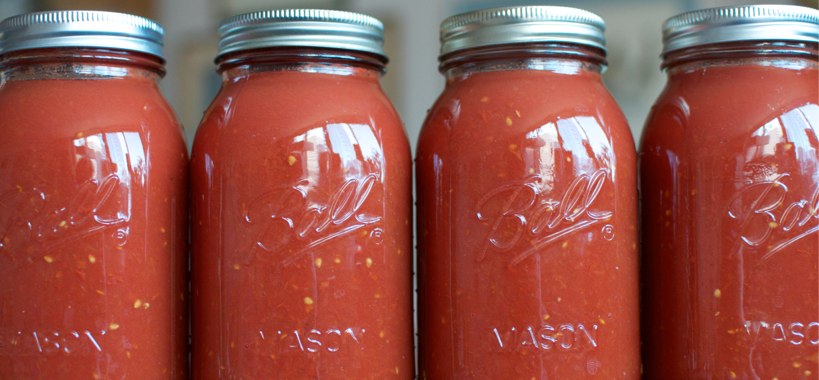
Tomatoes should have lemon juice or another citric acid added to them prior to canning to ensure their pH level is above 4.6, and ascorbic acid solutions can be added to fruits to prevent browning prior to placing in jars.
Iron, aluminum and copper should not be used when preparing your fruits and vegetables to can. These metals can cause discoloration of the produce.
3. Fill your jars.
There are a few things to remember when filling your jars. First, be sure not to fill them completely. Produce expands during the boiling process, so leaving adequate space at the top prevents the jar from leaking and making a mess.
After filling your jar with produce, unless canning jams, jellies and preserves, you’ll be pouring liquid to submerge the fruit or vegetables. Pour the boiling water, pickling solution or juice to cover up to the top of your produce.
Make sure there are no air bubbles along the sides of the jar and that the produce is submerged in the liquid. Wipe the rims of the jars down with a clean cloth and cap with the flat sealing lids and rims.
4. Process your jars.
Preheat water in your pot or pressure cooker. For hot produce, water should be preheated to 180º F, and for cold produce, it should be around 140º F. This will help prevent the jars from cracking when they are placed in the pot.
Water should be an inch or two above the top of the canning jar when they are placed in the pot for a water boiling process. Use a pressure canner according to the manufacturer’s directions to determine the amount of water needed in the bottom prior to adding the jars.
Add the jars using your tongs or jar lifter, and place them in the vessel so they are not touching. Place the lid on your pot or pressure canner. With water bath canning, bring the water to a slow boil and then start your timer to process for the length of time dictated by which vegetable you’re canning and the altitude at which you live. For pressure cooking, you’ll want to check for the length and temperature needed for your region as well.
Helpful Links:
- Find your elevation.
- Processing times table from National Center for Home Food Preservation

5. Remove your jars and let them cool.
Place your jars on a flat wood or cloth-covered solid surface to let them cool. Let them sit for a day to completely cool. While cooling, your jars will start to pop, creating the vacuum seal.
After they have cooled, press down on the center of your jars to ensure they have sealed completely. Any lids that spring back have not sealed and can be placed in the refrigerator and eaten first.
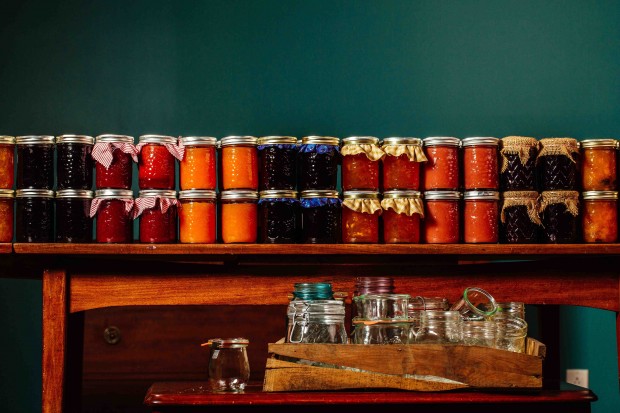
6. Label and store your preserved food.
Label your jars with the contents and the date. You can write directly on the lid with a Sharpie or download and print or purchase specialty labels for your jars.
Once you have them labeled and have wiped off any food pieces or water from the outside of the jar, store your food in a dark, dry place until you’re ready to enjoy.
Do you can your own produce? What are your favorite foods to can and preserve?

Good post!
Here’s another link to a post from a helpful canning blog about what you need for canning. http://bit.ly/cWWmQJ It’s a smaller list, but just about the same.
Also, depending on what type of tomato you are using, you may not need to use lemon juice when canning. Bright red tomatoes like Big Boy and Roma are plenty acidic, and there are others like them. The lighter colored tomatoes are much lower in acidity. Just research the tomato’s pH before canning, or else use the lemon juice if you want to play it safe.
Thanks, Jennifer. That’s a good point about the tomatoes! However, color doesn’t mean the tomatoes are lower in acidity. Additionally, the riper the tomato, the lower the acidity. So, be sure you’re canning under-ripe or just ripe tomatoes to prevent spoiling. Still, there are some varieties that have a pH near 4.6. Check out this article for a list of some of the varieties that are around 4.6.
I guess, if you’re worried about it, better safe than sorry. I know some people add the lemon juice all the time because that’s what their parents and grandparents did, and that’s what they’re used to canned tomatoes tasting like.
I do can produce. However, in hot central Florida it almost costs more to water a garden than what you will harvest. I buy most of my produce from u-pick farms and markets where I can buy it at a low price in bulk.
My favorite foods to can and preserve are of course jams but I also like a good conserve (peach almond is one I love), and chutneys. I also like to preserve whole (or large pieces) for later use. Basically, anything I can get a good deal on, I can preserve.
Also, I have asked my family and friends to return jars to be used again. They are the most expensive part of canning for me and I try to keep them coming back so that my costs stay low. Picking up jars at estate sales and flea markets also helps.
I like the list of materials you included. However, if you preserve with frequency, a Squeezo is a wonderful thing to own. I use mine frequently!
Thanks, bryssy! I am all for canning farmer’s market finds. About half of what we can comes from the farmer’s market because I would rather buy produce in season from there than buy it at the grocery store in the winter. Plus, I’m sure there are plenty of people who live in apartments or condos where there is no space to garden and might not have the option of a community garden.
bryssy, where do you go, if it’s okay to ask? I am in the Orlando area and haven’t found any U-pick farms yet.
I’m in rural Polk county, to the south of you. I end up going toward Tampa to the farms there. We love Sweetfields Farm ) they have a corn maze in the fall and a sunflower maze in the spring plus tons of organic u-picks – we always go during the maze times! There are also the Plant City strawberry growers (they gave away free strawberries this last March if you went and picked them) and in Ruskin for tomatoes – $5 a bushel in early June. We had local blueberries for a quarter a pint right at the end of the season (late May), too.
When I’m not up for the trip, I’ve made good friends with a lady at our local farmers market (I bring her samples of the stuff we make) who will pick up large quantities for me…..most recently 1 bushel of cucumbers for pickles about 2 weeks ago. She charges me $2 over cost – way better than I could do in gas alone!
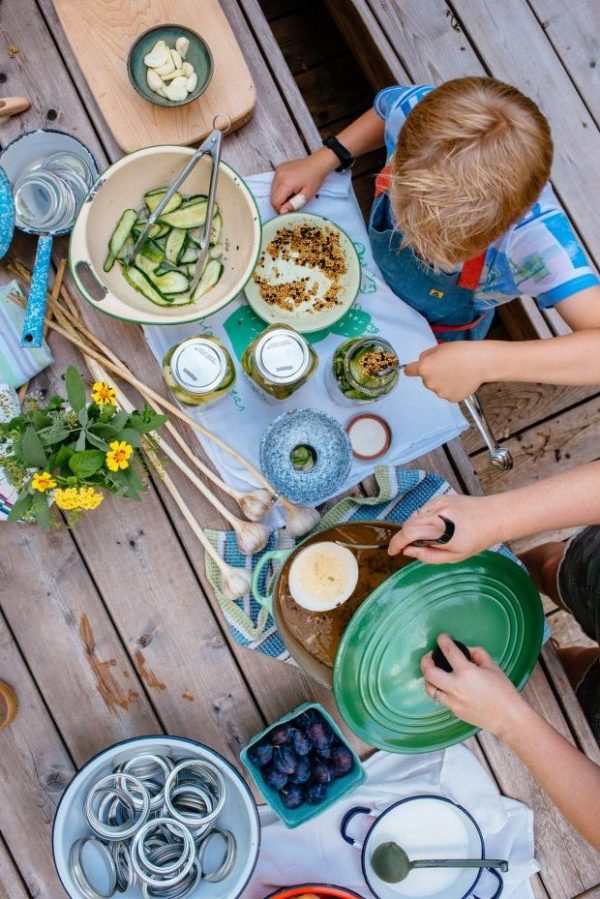
I’ve grew up in the town we live in, so I know a lot of locals. Plus, now that I’ve gotten many of my friends into it they watch for deals and find connections, too. We call our canning and preserving work “canning parties” and our kids come and help. Even the littlest can stir jam!
I am downright nervous to begin canning and sat on the fence for a while now… I’m looking forward to reading your posts and just doing it! Ok, now I’m gonna take a deep breath… ;o)
I’ve added the button to the sidebar and maybe we can inspire some more newbies like me 🙂
Thanks for adding our Canning 101 button, Sarah.
All together now: “Of Course I Can!”
Hi Sarah,
I felt the same way last year, but at the end of the season I took the plunge and tried canning tomatoes. It went so well I can’t believe I haven’t tried this before. Can’t wait to hear how your first adventures in canning go!
Great post. This is my first year canning and I can see how it’s mildly addictive. I’ve made jam before but that’s about as far as I’ve ventured into the preserving world, although I’m hoping to change that this year by making a slew of chutneys and pickles.
I’m looking forward to this series and all of the helpful hints and tips that I’m sure will come with it.
I am really hoping at finally giving canning a go this summer. All last year as I used canned tomatoes from the grocery store I thought, Why don’t I just do this myself?? Looking forward to the rest of the series, this is a great start!
I love this canning series – great idea! I am fairly new to canning and my advice to my fellow newbies is to start with something easy like jam. I have made strawberry, apricot and cherry and it is a great starter project. I have found this website to be very helpful: http://pickyourown.org/allaboutcanning.htm
Thanks for sharing the link, Robin. I think jam is a great place to start as well.
Good post! Thanks for sharing.I also have a special Chinese food website, and could we exchange website link each other?
Thanks!
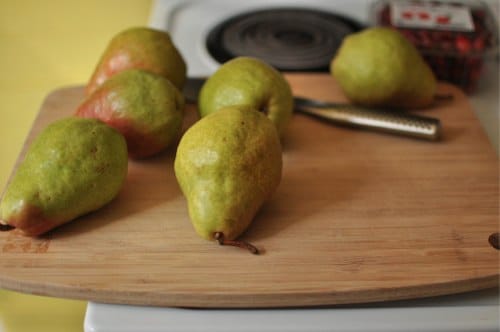
My brother has 3 pear trees and we get together and can them every year. They’re one of my favorite canned foods and there’s nothing better than being able to open up a jar in the middle of the winter!
What a great post! I just made jelly from my Nanking Cherry bush/tree this weekend. It always surprises me how little time it really takes. From picking to finished was less than 2 hrs and that included running to the store for jars.
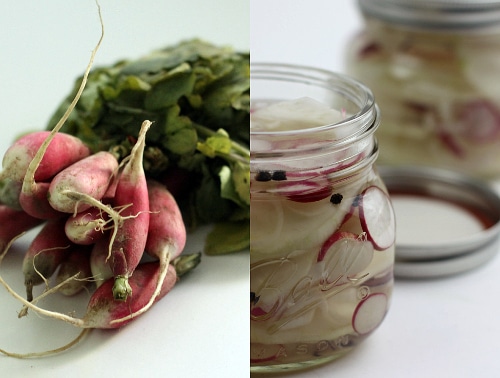
Thanks for all the ideas. I’m feeling inspired to do something with all these radishes. Never though about canning or pickling them.
We used to can LOTS of things when I was growing up – fruit, vegetables, meat, jams and jellies, pickles…
I want to start canning again, but someone told me recently that you aren’t supposed to can on a smooth top stove. Is that true? If so, why?
I can on my ceran top stove all the time. I have had no problems with it.
Is there a natural sugar you can use in canning? All recipies i find call for white refined suger. Can you use brown suger, sugar in the raw or cane juice? Soemthing more natural? love the post! i’m new to the world of canning but really enjoying it!
Thanks!
E
What kind of pressure canner do you recommend? Are there different types and quality? Just like there are different blenders. Looking forward to giving this a go!
I have always been told to use a large aluminum pot when boiling relish, salsa, chili sauce, etc., but in here it is mentioned that aluminum should not be used.
I have also been told not to use stainless steel or nonstick, so what do you recommend that I use?
That’s just for the prepping of your food to go into the cans, not the boiling water bath that you would put filled canning jars in to process. 🙂
Hi Shaina. Great post. I am a big fan of the new cookbook “Preservation Kitchen” by Paul Virant. He is chef/owner of Vie Restaurant in Western Springs, IL, and is known for his knack for canning. For people looking for both the basics, and more adventurous recipes and techniques for preserving, this book is an incredible resource. It took me from who had been mildly interested in canning for the last 25 years but had never done it, to a guy who talked his wife into spending the last four weekends in a sweaty kitchen, chopping, cutting, preparing brine, and processing our new jars. I am backing off on thinking we need a new storage freezer and am thinking about new pantry shelves!
i WANT to can so bad!! we did it years ago, all the tools have since been tossed! i am going to tag this site for spring!!
Out of curiosity,did you check with the FDA or the USDA to see if your canning method is approved by them?
As a matter of fact, Alli, I did. Thanks for being so concerned. You can find their recommendations on the National Center for Home Food Preservation Website. Don’t forget, however, Simple Bites is a Canadian blog, and for canning procedures and practices recommended by the Canadian government, you can reference the Healthy Canadians site. Furthermore, if you live in a different country outside of the US and Canada, there are different recommendations all around the world to check out. I hope that helps!
Great tutorial! I have never done this before, but since we bought a house with a big yard and room to grow things, I want to learn. Thanks, really helpful.