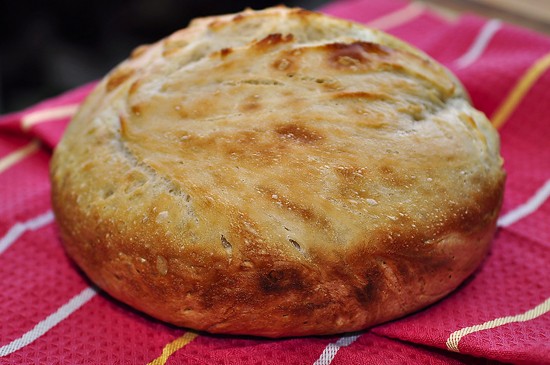
Simplifying the No-Knead Bread
This is a guest post from Sofya of The Girls’ Guide to Guns and Butter. Welcome, Sofya!
Growing up in Baku, the capital of then-Soviet Azerbaijan, I was spoiled by an easy access to some irresistibly delicious fresh bread – always made the day you bought it, often still quite hot. From factory-made French loaves to traditional naans that emerged from the tandoor ovens of street-corner operations, these bore no resemblance to the days-old, preservatives-laden packages I was faced with in my Wisconsin town of 4000.
It didn’t take long to realize that to enjoy the quality and the freshness I was used to, I would have to bake bread myself. Since great bread was widely produced and very affordable back home, it was uncommon for a city dweller like myself to know how to bake their own, so I had to learn from scratch.
Over the years, I have experimented with many different recipes – from wild sourdough to various yeasted varieties, but it wasn’t until I came across no-knead that I was finally able to reliably churn out great bread with regularity and ease.
No-Knead Bread: the Method
The simple method involved mixing all of the ingredients, letting the dough rise for a rather flexible stretch of time (anywhere between a few hours to overnight), and baking it at a really high heat after some minimal shaping and some extra rising time in a preheated dutch oven.
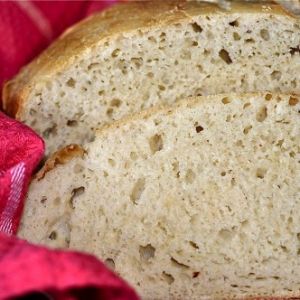
The steam trapped by the pot’s lid contributed to the crispy, chewy crust, while an extremely hot pot assured that the loaves would rise high and fast.
To streamline this process even further, I began to omit both the shaping of the dough into a loaf before baking and the second rise, cutting down on time, work, and, most importantly, the mess. I have also nearly doubled the original recipe to accommodate my family’s hearty appetites.
I cannot begin to tell you how thrilled I am to be sharing my simplified adaptation of this excellent, fail-proof recipe here at Simple Bites.

Ingredients
- 6 cups all-purpose flour you may substitute up to 2-1/2 cups with whole-wheat or other kind of wholegrain flour
- 3-1/2 teaspoon table salt
- 1/2 teaspoon active dry yeast sprinkled over 1/2 cup of warm water between 110 and 115 degrees F
- 3 cups water at 110 to 115-degree F
Instructions
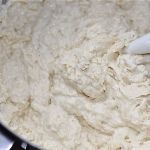
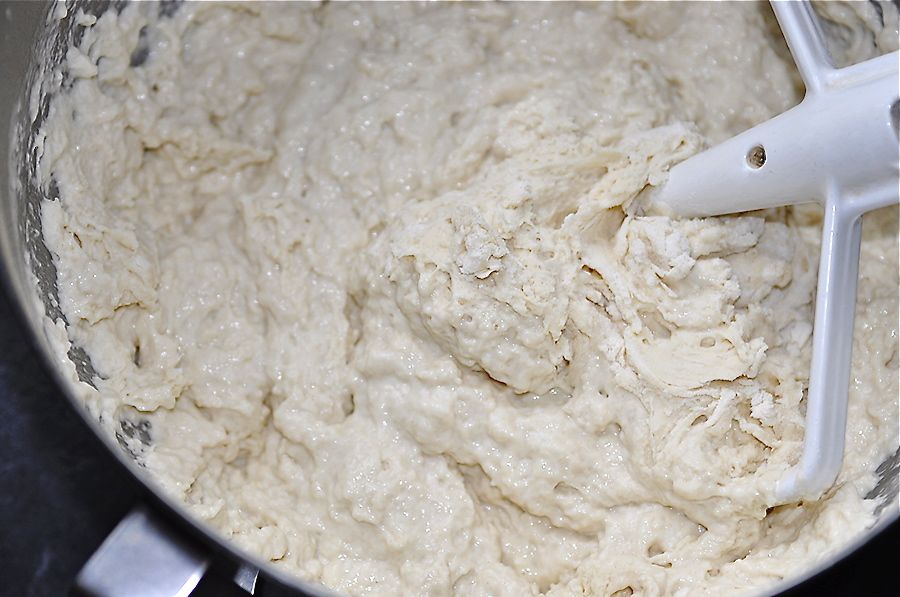
- Mix all ingredients together in a bowl of a stand mixer using the paddle attachment (I always start at the slowest speed to avoid flour flying into the air, and once most of the flour is incorporated, I switch to the second-slowest speed to finish).
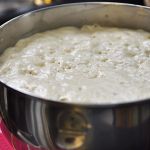
- Alternatively, use a wooden spoon to mix everything in a large bowl. When you are done, your dough will look like this:

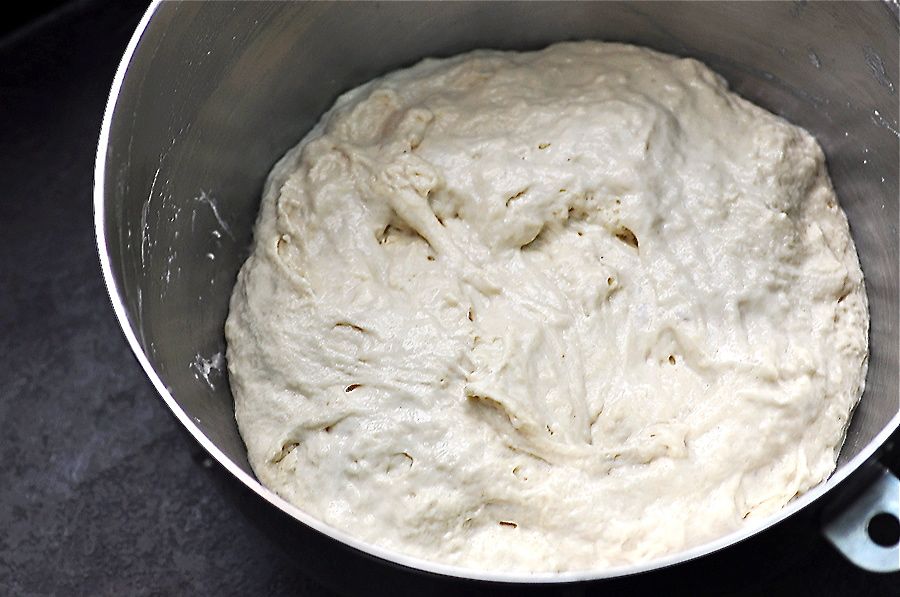
- Next, use a bowl scraper or a rubber spatula to scrape the sides of the bowl and to compact the dough neatly on the bottom:
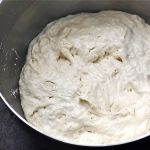
- Cover the bowl with a plate and allow the dough to rise at room temperature from between 4-5 hours to overnight.
- I usually make my dough in the evening and then bake it the following morning, but I’ve also been known to increase the amount of yeast to 2 teaspoons for a quick two-hour rise in a pinch.
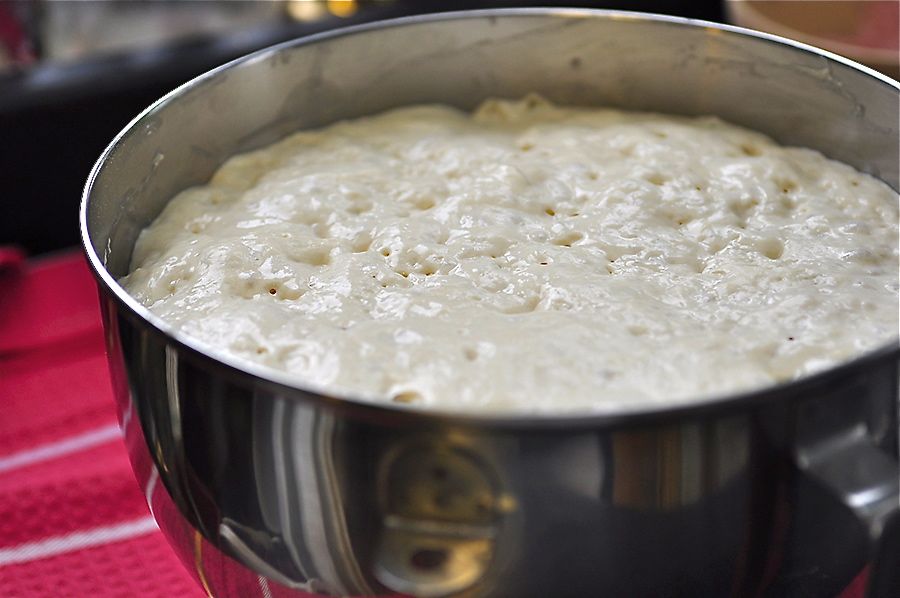
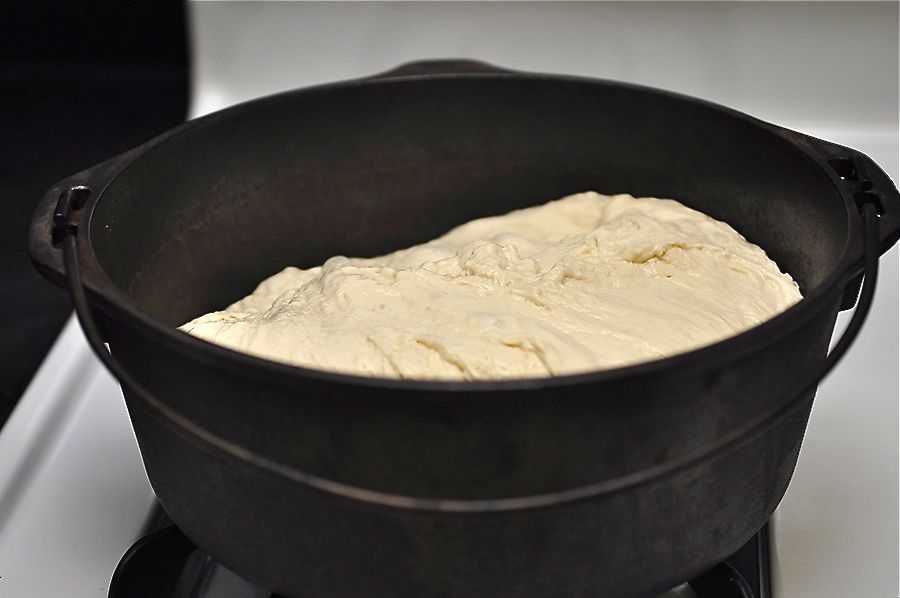
- The dough is ready to bake as soon as it has doubled in bulk and the surface has become dotted with air bubbles:
- Half-an-hour before you intend to bake, place your dutch oven into the oven and set the temperature to 500 degrees F. Set the timer for 30 minutes.
- Both an enameled and a non-enameled dutch oven will work. Since I bake nearly daily, I keep a dedicated Lodge 5-Quart Pre-Seasoned Dutch Oven specifically for this purpose:
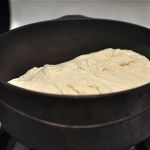
- Once the timer goes off, pour your dough directly into the hot pot, using a bowl scraper or a rubber spatula to make sure all of it goes in. Note that it won’t have much of a shape at this point:
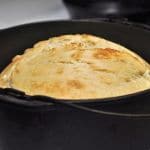
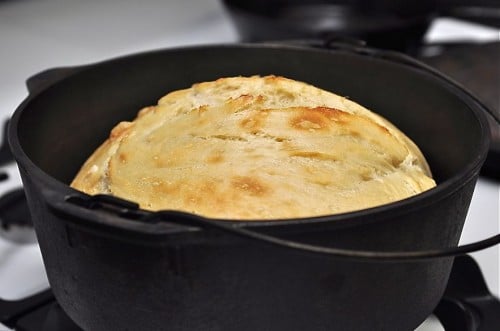
- Set your timer for another 30 minutes. If your loaf appears a little pale upon emerging from the oven, keep the lid off and return the bread to the oven for the additional 3-5 minutes, or until the loaf is browned to your liking.
- Just keep in mind that, if you keep it in there for too long, the loaf might stick to the bottom of the pot and be difficult to remove. If this happens, allow it to cool in the dutch oven as the loaf will pull itself from the bottom as it cools and shrinks.
- A word of caution: Your pot will become incredibly hot in the 500-degree oven, so be sure to double-up your pot holders!
Notes
Nutrition
Now wasn’t that simple? Give it a try and come back and tell us what you think.
What a fun and interesting post/recipe! One of my favorite things in the world is homemade breads (of all kinds) and this is certainly a new one for me. Thanks so much for sharing this. I must try it…and soon!
I hate to be Debbie Downer, but I tried this recipe a couple of days ago and it was a total flop. I’m an experienced bread maker, but had never tried artisan bread before. I’m wondering if the yeast measurement is correct? One-half teaspoon seems like an awfully small amount for a recipe that calls for so much flour. And it didn’t rise for me at all. However, I did try this recipe today: http://www.food.com/recipe/5-minute-artisan-bread-325571 which called for the same amount of flour but a tablespoon and a half of yeast. It turned out perfectly and was very simple.
i’ve never made this specific recipe, but i have made the Jim Lahey/sulivan street bakery recipe(as well as another adaptation of it), and one thing that i’ve learned is you have to make sure you should check on the dough as soon as you get up in the morning, or if you make it during the day, about 7 hours in. once it get bubbles on it, you should start on the next steps right away, because if you try to wait a full twelve hours or whatever, and it’s already bubbled at seven, it doesn’t want to cook up properly, and you get this sort of flat-ish, biscuit-looking bread that, while tasty, isn’t what you’re going for.
as to your question about the yeast, the idea here is that you don’t need a whole lot of yeast, because the long rise makes up for the large amount of yeast you would normally use.
I hope that this helps
So exciting to see you over here Sofya! Your bread looks wonderful!!
I first saw the NYT recipe in Mother Earth News and enjoyed it the one time I baked it…I look forward to trying out this simplified version this weekend! Thanks for the pictures and tips about using your mixer – I’ve never used my mixer for anything but mashed potatoes and I look forward to using it for baking up a loaf.
I bake my own bread too, and I love this technique! I also use “Artisan Bread in 5 Minutes a Day.” Also a great technique.
I’ve also modified the no-knead recipe by using 1/2 cup of sourdough starter instead of yeast. Let rise 12-18 hours then bake as usual. I typically start mine the evening before I want to have bread for supper the next day to give it the full 18 hours rise time. I love the results I get from the no knead method!
I use sourdough with the no-knead method as well. Turns out great! I used to use a cast iron Dutch oven, but now I use a La Cloche clay baker and it’s so much easier. After shaping the loaf I put it on a square of parchment to rise and just lift the whole thing into the bottom of the baker in the oven. Works great! Unfortunately I don’t have a stand mixer :((( So I use a large dough whisk that I got from King Arthur Flour to stir the dough together – a huge improvement over the wooden spoon.
The first time I made the NY Times no-knead bread I was hooked! It’s so easy and has a great crust. I will have to try your version.
This looks so yummy that I want to lick my monitor! Yet another reason to invest in a dutch oven soon.
What a great article! I’ve personally been doing a lot of research into food additives and what is actually in the food my family and I are eating. It’s really hard to find a good, delicious bread that doesn’t have some kind of additives…be it corn syrup, wheat gluten, preservatives, or even food coloring. I thought that it would be nice to learn to bake bread…but being a career gal from NYC…bread making is not a skill I possess! This recipe is so very easy! I’m really excited to try it. Thanks!
I have tried many different recipes and finally I have found super easy way to make bread at home thanks to you! Bread is delicious, I so wanted to try it instead of using dutch oven I don’t have etc.
Andrew – you don’t have to have a dutch oven to pull this off, two of my friends used a stock pot and it turned out great, and if your pot’s lid is glass, I wouldn’t recommend using that lid for this purpose for the fear it would shatter from such intense heat, just cover with a cookie sheet. Another friend used aluminum foil but I don’t know how you can wrap it around a hot pot.
What did you end up baking it in?
I wonder if I can add cinnamon and raisins to this recipe?
Ohhh, I’m so intimidated by bread! I think I could actually make this, and my husband’s a tad obsessed with our dutch oven.
Noelle – without a doubt, you can. Try maybe 1/4 to 1/2 C of raisins and 1/2 of cinnamon?
1/2 t of cinnamon I meant.
Amanda – this is quite un-intimidating, in my opinion, give it a try!
Hi, I was really excited to see a quicker method than the traditional kneading method.
I tried it today. I used 4 cups Best of Bread flour and 2 cups white flour. Next time i would use less salt though. More like 1 tsp. I let it sit all night and it almost tripled in size. Then in the morning i split it into 3 metal bread pans and covered it with a cookie sheet in the oven. The smoke detector went off and the bottom got quite burned. In the oven, however the bread almost tripled in size again. It tasted , but very burned because of the high temperature.
Next time i will try baking it in a preheated 350 F oven for one hour. I will leave a comment when i try it.
Hi Belinda,
I am pretty sure that this recipe’s high temperature is not for baking bread in open loaf pans (sounds like that’s what you used?), since the covered dutch oven or an equivalent protects the bread inside from the intense heat, needed to heat the dutch oven itself to become an oven of its own that does the actual baking. Does this make sense? The usual temperature for loaf-pan bread is 375.
It does just about triple during baking and rising and it is meant to – that’s why an ample vessel like a dutch oven or a stock pot is needed. My dutch oven is 5.5 qt oven (something like that). The reason I think it grows so much is because the dough is that much runnier than your standard, kneaded bread dough, which is considerably stiffer and traps the air more, preventing such dramatic expansion. This batter-dough recipe is not meant to keep shape in loaf pans, I don’t think, unlike proper kneaded bread. If you are going to try it again, I think you either gonna have to increase the amount of flour (thus running into the problem of having to shape it) or use the type of vessel it’s been created for by the people who developed it in NYC.
Just wanted to let you know that I had found similar recipes to this one and they all suggested using the Dutch Oven, which I do not have. Despair set in as I thought about using my stock pot with the glass lid. THANK YOU THANK YOU THANK YOU for suggesting to use a cookie sheet as a lid. I can’t believe that I didn’t think of that on my own. Guess what I am doing tonight. Baking bread. Yay!
Can’t wait to try this out. Rookie question: is a stockpot just a basic, large pot with two handles? We have our massive All-Clad one, but no dutch oven. Will the big old All-Clad pot work?
I’m thinking I’ll wait until our Virginia heat wave breaks a big to warm up my oven to 500 degrees! Or maybe just bake at night. Thanks for the easy instructions!
Katherine – generally, the loaf, especially in the absence of shaping, comes out higher and rounder in a pot with a smaller diameter. The reason people found that stock-pots work was because stock-pots are generally tall and skinny (tallness doesn’t really matter here but the skinniness does). A friend of mine had something that looked like this:
http://www.amazon.com/All-Clad-Stainless-12-Quart-Tall-Stock/dp/B000RAAOOU/ref=sr_1_3?s=home-garden&ie=UTF8&qid=1307964184&sr=1-3
Although I realize there is a range of things out there called “stock-pot,” skinnier ones will work better in this case.
Now baking at 500 (and I even like to go up to 510 to make it go faster) can be hard if it’s 90 degrees and humid outside as it was for a while here in WI, but I still do because I prefer not to buy bread locally (it just isn’t great here). Best of all is to bake when it’s the coolest, in the AM, if you are home. Works well with mixing up the dough the night before.
Can you sprinkle some cornmeal on the bottom of the dutch oven before dumping the bread dough in to control the sticking better? Or would the cornmeal burn (or ruin the pot) at the high temps?
Heather – did you have trouble with sticking? In my experience, it sticks for one of the two reasons 1)pan not hot enough when you dump the dough in (it should be really, super-duper hot) 2)you leave the bread in the dutch oven for TOO long (like, if you either forget to remove the whole thing from your oven at the right time and/or don’t remove the bread from the vessel you’ve baked it in IMMEDIATELY after it’s done baking. If both of these conditions are met, sticking does not occur in my non-enamel dutch oven or the enameled one, both. If it does stick, let it sit for a while in the dutch oven, and it will, eventually, release as the oven cools down (but at the cost of the crust being on the burned side). As far as using cornmeal, I don’t like the flavor or the texture of it on my bread – the crunch on my teeth especially, and, like I said, there’s no need for it at all in this case if it’s done the right way. As to whether or not it will burn, I can’t say since I haven’t tried it.
Cornmeal works just fine. It browns in the pot but doesn’t have any off taste or texture on the bread. I have an enameled (shiny) stockpot and it worked great. However I didn’t like the way the dough stuck to the plastic wrap in the bowl. It “broke” the dough and made it super difficult to get into the hot hot hot pan. I am going to try some non-stick spray with flour to ease the transfer. Can’t wait to try my second batch!
I have dug out my Lodge “chicken fryer”…I luv that pan…and my dough is raising…I can hardly wait. I was not so impressed with the original recipe of the Artisan bread, being a traditionalist when it comes to my breads, but! I just had to try this unique way of baking it at such a high temp. Besides, I dont get to use my favorite pan very often as I only use if for deep frying…so the temptation was just too much…I can hardly wait for supper!!
thanks for sharing Sofya!
Reporting back…had it for breakfast this morning…very very chewy, very crusty, husband said it needs less salt. I think I would need a narrower pan if I were to make this often as my pan may be a smidge wide. Not the type of bread I would use on a daily basis as we find the texture ultra spongy, but it would go well with soups or stew.
AND!!… It was fun to make…
Thanks for trying it JoyS! I know what you mean about crusty and spongy… It is not like the American (North-American?) sandwich bread, for sure! But it happened to be extremely similar to what I grew up with back home when it came to both sandwiches and soups. I can hardly keep enough in the house, our family of four goes through one of these loaves in a day!
Ahhh….a cookie sheet lid! What an excellent idea! I’ve been wanting to make these breads for 2 years now, but my dutch oven pot is only safe up to 400 degrees. Thanks so much for the ingenious work around! Will have to give it a try 🙂
I love this= nothing like the artisan breads and the ease of it, also. Will be trying this soon! The photos are great also!
I wanted to add one more bit of info to this, which I didn’t think of initially. The quality of the flour you use for this seems to make a difference. Organic flour seems to work better for this recipe, and for bread-baking in general (the unbleached, unenriched, all-purpose kind). If that is not an option, King Arthur’s all-purpose flour (NOT the high-gluten/”bread” variety) also yields good results when it comes to bread.
This is an amazing recipe… I just made it today. I can already tell it’s going to be a hit at dinner tonight! Thank you so much for sharing it. The photos were very helpful since I am a visual person. I apperciate posts like this one very much….
i’m so excited for this recipe – my bread is rising right now! i chopped up a fresh garlic scape and threw it into the batter, so hopefully it’ll give it a little bit of tang. can’t wait to eat this 🙂 thanks!
Just don’t cut into it until it’s fully cooled, Meg! Otherwise it will be wet inside. After I’ve written this post, I got a number of questions where people wondered how to avoid the wetness. These type of breads continue to cook in their crust as they cool – this is because the moisture from the center spreads towards the edges while the heat from the crust radiates inwards until it’s all evened out by the time it’s cool.
I love it! I have made 2 very tasty loaves. I’m using the original quantities and baking it in a stockpot. My only problem is that it keeps sticking to the bottom 🙁 This morning’s loaf the bottom stayed completely stuck when I tried to take it out. It would not release upon immediately coming out of the oven or after cooling. Since I’m using a stock pot could I tweak things by not preheating the stock pot and then oiling the bottom?
Marlena – I haven’t tried oiling with this recipe, but it seems to me that oil might burn at that temperature. It’s true that not every pot allows for easy release, with a non-enamel dutch oven being the absolute best. Are you sure your pot was super-duper hot when you put the bread in there? I think not pre-heating your pot is actually a way to get it to stick, plus, the vessel won’t be hot enough this way to give the bread its rapid rise, so I wouldn’t consider not pre-heating it. Is there another vessel you could try?
Marlena – another thing. A quick internet search returned these results (from the Apartment Therapy Kitchn): http://www.thekitchn.com/thekitchn/good-questions/help-my-noknead-bread-is-stuck-to-my-pan-good-questions-140890
They basically say the same thing – the pot should be really hot. Depending on how hot your oven actually bakes (they aren’t always spot-on on the temp), you might need to increase the temp. Are you sure your oven doesn’t bake lower than it says it does? In my oven, 500 is actually “510.” I would say my dutch oven needs to be in the oven for 30 to 40 min and feel dangerously hot before it’s ready to go.
P.S.: If you scroll down to reader comments on that post, people suggest a number of other solutions as well, including lining your pot with parchment paper!
Sofya, I baked bread many times at home. I love making my own bread. As you mentioned, it’s the closest to what I grew up with. Most American style breads are just too soft and “mushy” for our taste. If we buy, we try to stick with the Artisan breads. But nothing beats homemade.
I have a questions. I don’t have a dutch oven. Can I somehow use a cast iron pan for this recipe and maybe reduce the oven temp? I also baked bread with a pot of water in the oven to create a steam bath for the bread. It creates a great tasting spongy bread. but I’m wondering if using a cast iron pan will help make the bread better. What do you think?
Olga
Hey Olga,
I would say that if you are going to use this particular bread recipe, proportions and all, a cast iron skillet (which I assume you mean) will not work because its sides are not high enough to hold this bread – keep in mind that this bread gets its shape from the vessel in which it is baked – since this dough is very close to batter in consistency (it’s something you pour – not shape), it won’t hold its own shape in a cast iron pan, probably spilling over. Instead, I suggest that you use a stock pot (please see the comments above). The important part here is not cast iron per se, but a tall, oven-proof pot.
As to whether or not use a cast iron skillet for other bread recipes, you’re gonna have to give it a try on your own.
I have to tell you *grinning* that I found your site by accident.
And then I found this recipe by accident.
This recipe is BY FAR the easiest, tastiest, most reliable loaf of bread I have ever cooked in my life. (And I have COOKED SOME BREADS.)
My first batch was Thursday, another one Friday, 2 on Saturday, 2 on Sunday.
Used my Dutch oven, followed the recipe, they ALL turned out perfectly. Wonderful, wonderful. Love it, love it, love it! Thanks! Somebody – somewhere – needs to give you a raise!
Just wanted to let you know that I tried this with 4 cups whole wheat + 2 cups of white and it was lovely. I will be tweaking some more and trying rye as well, but such a great recipe. Thanks!
i like to add veggie puree to my bread, would this work in this bread
I haven’t tried anything like this, but if you decide to try it, you will need to replace the water in the recipe with the puree, either partially or entirely (depending on how watery your puree is). I am also wondering if things like squash, if this is what you had in mind, might burn at this temp because of the sugar content. I hope you won’t have vegetable puree burned onto your dutch oven.
Would a 3 quart cast iron chicken fryer work for this recicpe? I am looking to purchase a Staub dutch oven some day…..what size works best?
Yes, if:
-your pot has a tight-fitting lid
and
-you divide the recipe in half
The full recipe has been developed for a 5.5-quart lodge dutch oven (NON-enamel).
Sofya, last Friday I finally posted my version of no-knead bread that I came up with several years ago. Today I got the idea of googling the bread and seeing what other bloggers have done with it. Love your photos! Looks like you make an even larger loaf than I do–I don’t know why anyone would want to make the tiny 3-cups-of-flour loaf of the original recipe!
Have used the original No Knead recipe many times since it was first published in the New York Times, and have loved the results.
I am intrigued by your simpler method but am confused by one point, namely, that you call for baking the bread for only 30 minutes. This is 20 to 30 minutes less than the original recipe. How can the bread cook in so short a time?
That’s cause I bake at 500 instead of the original 450. Either way, point is, it need not be shaped.
Just taken the bread out of the oven looks fantastic hope it tastes as good, will let you know, it took 7 hours to double in size, I live in Greece and it is hot and I am on the coast not sure if this has effect on rising time glad I did it in the morning so I could keep my eye on it thanks for a great recipe.
My dough has been sitting since 12:30 am, and hasn’t done much. How much is it supposed to rise in the first cycle?
More than double. Sounds like it was either too cold where the dough was sitting, or your yeast may have been too old, or your water may have been too cold or hot (needs to be b/w 110 and 120 degrees I believe). Next time try using more yeast and let it rise in a warm place.
Hi, I have been makingthis bread a few times, really delicious, my only problem is the slicing. We let it cool for 2 hours, even my breadknife gives me trouble. It takes at least 8 or more cuts across the loaf in order to get a slice. Maybe I need to buy different flour, would appreciate a suggestion.
Sincerely, Hildegard